Showing posts with label Tunnels. Show all posts

Sunday, June 8, 2014

Tunnel Portals

My latest project is a tunnel portal. I want to get the first tunnel closed up so that I can start shaping the mountain. 


I'm using Woodland Scenics Timber Tunnel Portals for the first of 4 tunnels.  I'm not sure what I will use for future tunnels. I'll decided later. 


The portals are plaster cast with pretty good detail.  There is some flash that needs to be filed off, but overall there is little prep work.  


I chose to use Woodland Scenics paint for this project.  You can use just about any paint that works on plaster.  I wanted to use Burnt Umber.  Its reddish brown in color.  Its a bit more expensive than the traditional acrylic paints you can buy in craft stores, but even with hundreds of color choices at Michaels, I still couldn't find a good brown.


Here is the almost finished product.  I still need to add some detail colors and weathering, which I will do with some paint and a bit of chalk.
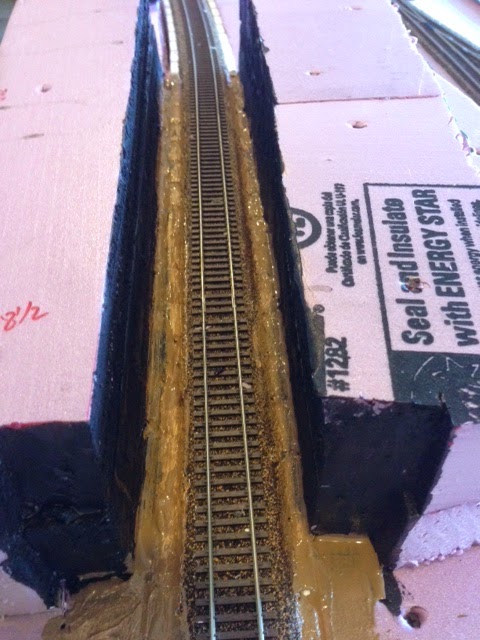
  

I also painted the sides of the roadbed in the tunnel.  I used a latex paint.  Nutmeg is the color.  When it dries, I will ballast the track and start closing up the tunnel.  


Sunday, June 1, 2014

Tunnels and Train Stations

I've been spending more and more time on the layout lately.  It's coming along, but its also a bit behind schedule. I had planned on building two module frames a month, which means I should now have 6 built, but I only have 4.  I guess I'll try to get two more built this month.  


This is the main passenger station for the Twin Lakes & Western Scenic RR.  I'm working on the last few details including:  windows, doors, real clocks for the clock tower, and interior / exterior lighting. I also need to do a bit of weathering to the roof.  


This is looking down module 2 and module 1.  I extended the main road onto module 2, which creates a RR crossing seen at the bottom of the pic. To the left, on the near side of the tracks, will be a drive in movie theater.  Farther down on the left will be a KFC, McDonalds, Taco Bell and a Shell Station.  Some sort of small light industry will fill the area on the right side of the road.


I painted the roof piece of the tunnel.


The walls of the tunnel are painted black. I've used dark grey in the past, but this time I want it to be dark in the tunnel. Now I need to paint the roadbed and rails, then ballast before closing up the tunnel.


Looking uphill through the tunnel site.  

Friday, May 30, 2014

Tunnel Work

This week I spent most of my time gluing track and new roadbed down. I also focused on building up some of the base scenery around the first tunnel. 

Three 18 volt batteries act as weights on the track while the glue dries.  This is module #3 as the highline heads up the grade.


Module #4 track risers are in the process of being glued into place and roadbed I have begun laying roadbed. 


The base of the first tunnel is complete, sort of.  The top pieces are not glued in place yet, since I will need complete the inside of the tunnel. I use wood glue and 3" sheet rock screws to build up the pink foam sections.  I find that the wood glue gives a strong bond and is fairly inexpensive.  The screws are have a course thread and help hold the pieces tightly together. Most of the screws stay in the foam, but some will be pulled as I start carving the foam.  I will paint the inside of the tunnel dark grey or black and will probably ballast the track all the way through since its a short tunnel.  Once I complete those tasks, I can close up the tunnel permanently.  


Here is the view from the downhill side of the tunnel.  


The mountain looks pretty square and 'blocky' right now, but after some carving, painting, rock casts, turf and trees, it will look pretty good.  Stay tuned and watch the transformation.  


Here is a view of module #1 from inside the layout.  Brandon, my son, has been busy playing around with building layouts that fit nicely.  This is the look we like the most so far.  The train station will have platforms extending left and right from the main building. The main street buildings are pretty much where they will be placed.  The building on the far side of the tracks is The Toy Factory, where I work in 'real' life.  It sits on the front of the layout because it will have a full lighted interior.